# Nacos Config 客户端的使用
# POM
此处我们以之前创建的 服务提供者 项目为例
在 pom.xml 中增加 org.springframework.cloud:spring-cloud-starter-alibaba-nacos-config 依赖
    <dependency>
        <groupId>org.springframework.cloud</groupId>
        <artifactId>spring-cloud-starter-alibaba-nacos-config</artifactId>
    </dependency>
1
2
3
4
2
3
4
完整的 pom.xml 如下:
    <?xml version="1.0" encoding="UTF-8"?>
    <project xmlns="http://maven.apache.org/POM/4.0.0" xmlns:xsi="http://www.w3.org/2001/XMLSchema-instance"
             xsi:schemaLocation="http://maven.apache.org/POM/4.0.0 http://maven.apache.org/xsd/maven-4.0.0.xsd">
        <modelVersion>4.0.0</modelVersion>

        <parent>
            <groupId>com.cmcc</groupId>
            <artifactId>hello-spring-cloud-alibaba-dependencies</artifactId>
            <version>1.0.0-SNAPSHOT</version>
            <relativePath>../hello-spring-cloud-alibaba-dependencies/pom.xml</relativePath>
        </parent>

        <artifactId>hello-spring-cloud-alibaba-nacos-provider</artifactId>
        <packaging>jar</packaging>

        <name>hello-spring-cloud-alibaba-nacos-provider</name>
        <url>http://www.cmcc.com</url>
        <inceptionYear>2018-Now</inceptionYear>

        <dependencies>
            <!-- Spring Boot Begin -->
            <dependency>
                <groupId>org.springframework.boot</groupId>
                <artifactId>spring-boot-starter-web</artifactId>
            </dependency>
            <dependency>
                <groupId>org.springframework.boot</groupId>
                <artifactId>spring-boot-starter-actuator</artifactId>
            </dependency>
            <dependency>
                <groupId>org.springframework.boot</groupId>
                <artifactId>spring-boot-starter-test</artifactId>
                <scope>test</scope>
            </dependency>
            <!-- Spring Boot End -->

            <!-- Spring Cloud Begin -->
            <dependency>
                <groupId>org.springframework.cloud</groupId>
                <artifactId>spring-cloud-starter-alibaba-nacos-discovery</artifactId>
            </dependency>
            <dependency>
                <groupId>org.springframework.cloud</groupId>
                <artifactId>spring-cloud-starter-alibaba-nacos-config</artifactId>
            </dependency>
            <!-- Spring Cloud End -->
        </dependencies>

        <build>
            <plugins>
                <plugin>
                    <groupId>org.springframework.boot</groupId>
                    <artifactId>spring-boot-maven-plugin</artifactId>
                    <configuration>
                        <mainClass>com.cmcc.hello.spring.cloud.alibaba.nacos.provider.NacosProviderApplication</mainClass>
                    </configuration>
                </plugin>
            </plugins>
        </build>
    </project>
1
2
3
4
5
6
7
8
9
10
11
12
13
14
15
16
17
18
19
20
21
22
23
24
25
26
27
28
29
30
31
32
33
34
35
36
37
38
39
40
41
42
43
44
45
46
47
48
49
50
51
52
53
54
55
56
57
58
59
60
2
3
4
5
6
7
8
9
10
11
12
13
14
15
16
17
18
19
20
21
22
23
24
25
26
27
28
29
30
31
32
33
34
35
36
37
38
39
40
41
42
43
44
45
46
47
48
49
50
51
52
53
54
55
56
57
58
59
60
# bootstrap.properties
创建名为 bootstrap.properties 的配置文件并删除之前创建的 application.yml 配置文件,由于已经在服务端配置,此处不再赘述
    # 这里的应用名对应 Nacos Config 中的 Data ID,实际应用名称以配置中心的配置为准
    spring.application.name=nacos-provider-config
    # 指定查找名为 nacos-provider-config.yaml 的配置文件
    spring.cloud.nacos.config.file-extension=yaml
    # Nacos Server 的地址
    spring.cloud.nacos.config.server-addr=127.0.0.1:8848
1
2
3
4
5
6
2
3
4
5
6
注意:在之前的 Spring Cloud Netflix 课程中有提到过 Spring Boot 配置文件的加载顺序,依次为 bootstrap.properties -> bootstrap.yml -> application.properties -> application.yml ,其中 bootstrap.properties 配置为最高优先级
# 启动应用程序
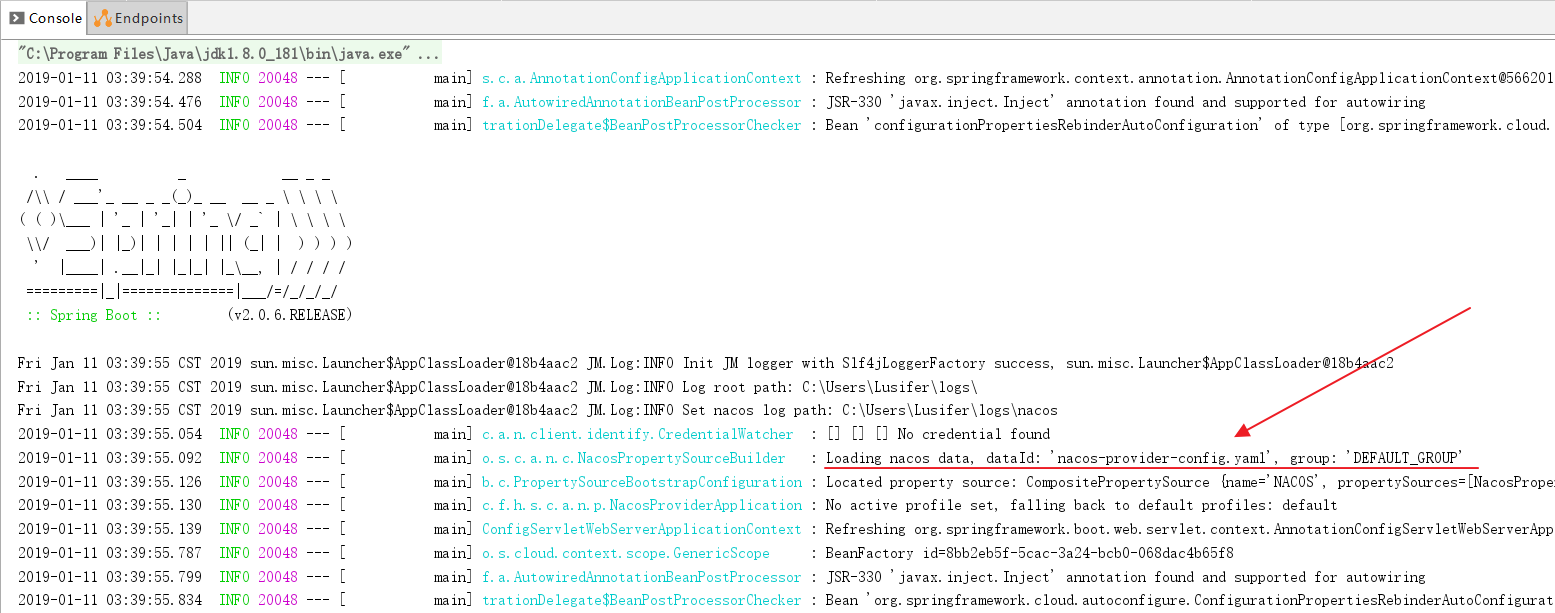
启动应用后我们可以通过日志看到,已经成功加载到了配置文件
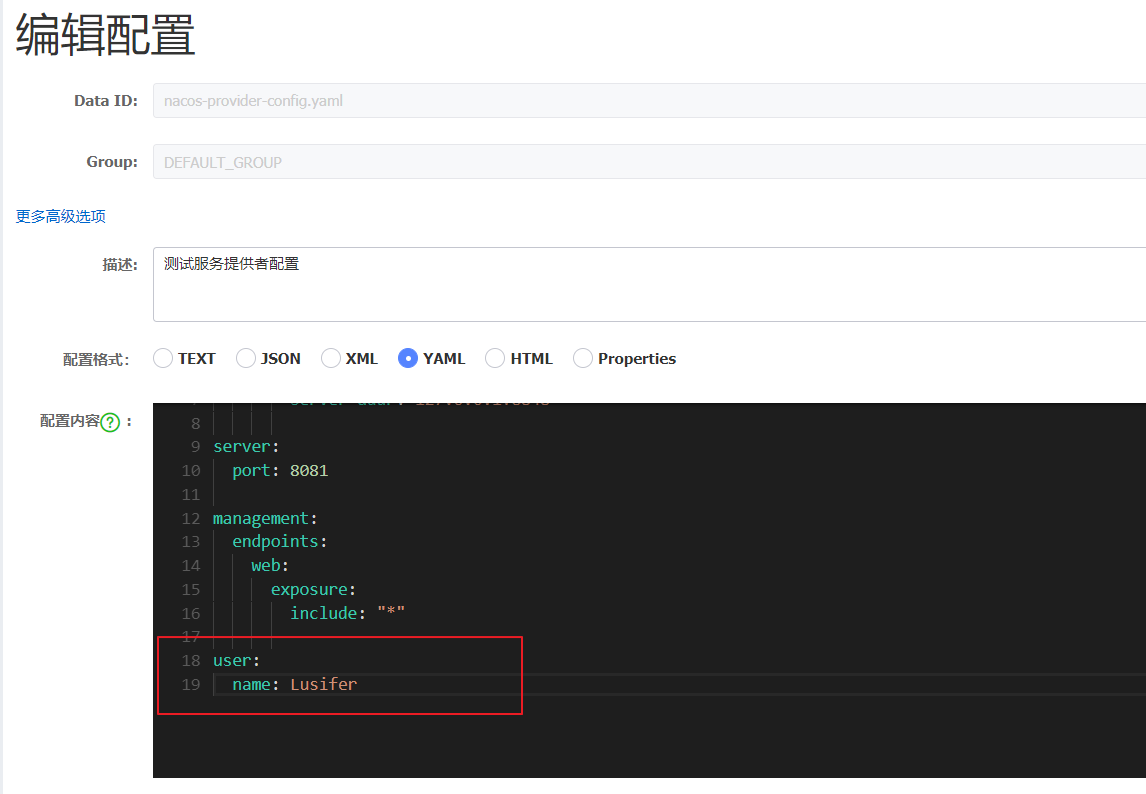
# 配置的动态更新
Nacos Config 也支持配置的动态更新,操作流程如下:
- 修改服务端配置,增加一个
user.name的属性
- 修改 Controller ,增加一个请求方法,测试配置更新效果
    // 注入配置文件上下文
    @Autowired
    private ConfigurableApplicationContext applicationContext;

    // 从上下文中读取配置
    @GetMapping(value = "/hi")
    public String sayHi() {
        return "Hello " + applicationContext.getEnvironment().getProperty("user.name");
    }
1
2
3
4
5
6
7
8
9
2
3
4
5
6
7
8
9
- 通过浏览器访问该接口,浏览器显示
Hello cmcc
1
- 修改服务端配置
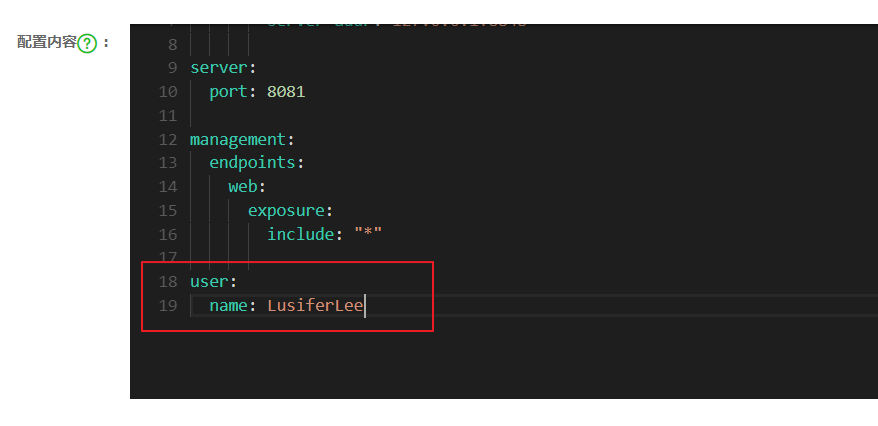
此时观察控制台日志,你会发现我们已经成功刷新了配置

- 刷新浏览器,浏览器显示
Hello cmccLee
1
注意:你可以使用 spring.cloud.nacos.config.refresh.enabled=false 来关闭动态刷新